DENTAL MANAGEMENT SYSTEM
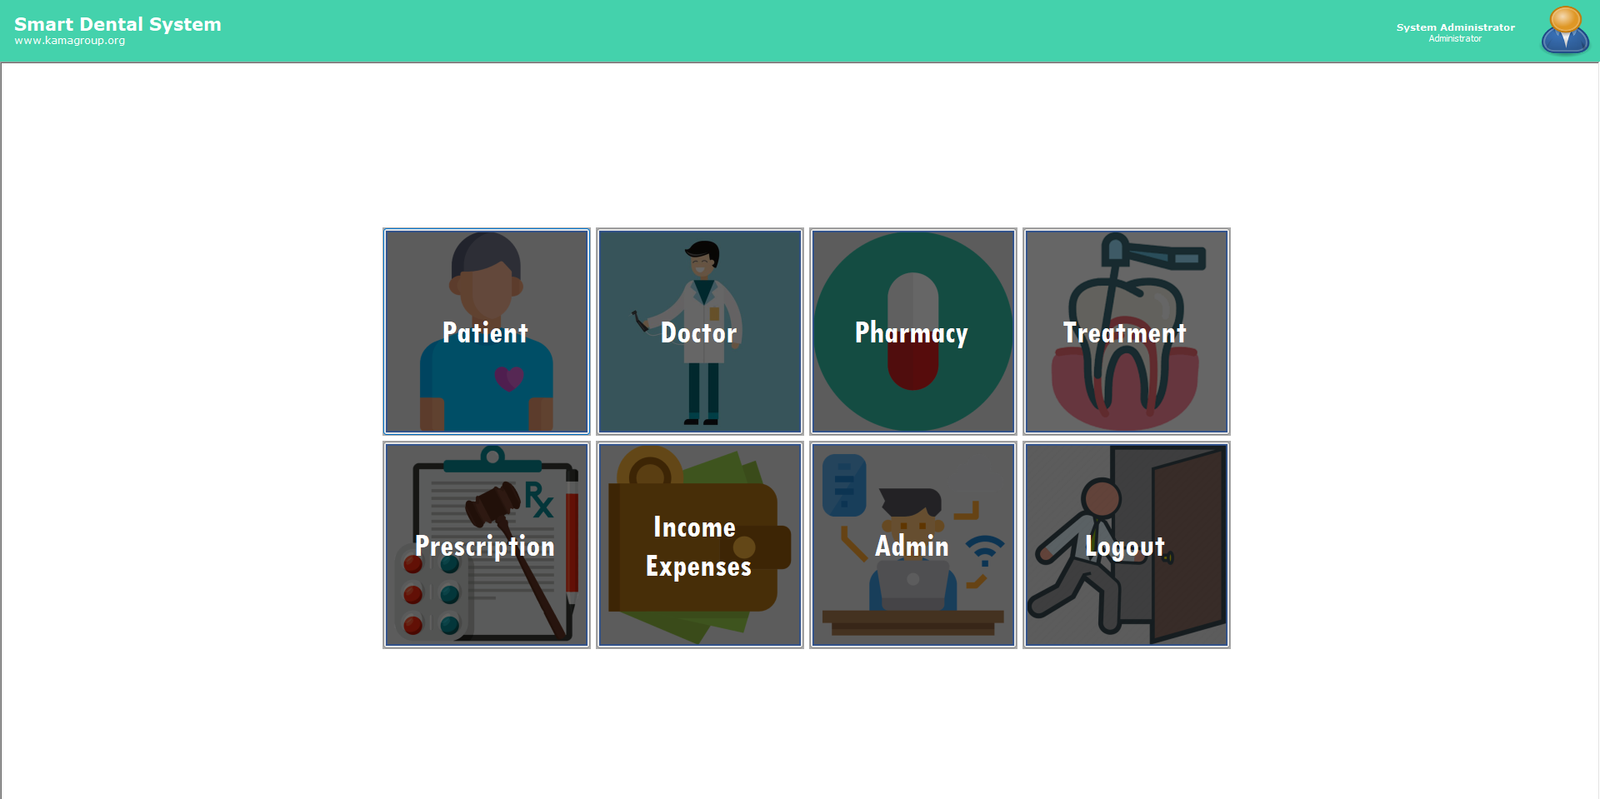
This is the Dashboard where Admin/Users can see all the operation buttons. From this panel Admin/Users can manage the Patient and Doctor Information, Pharmacy Management, Medicine Information, Sales, Dental Screen with Notation, Dental Symptoms, Procedure & Diagnosis, Patient Billing, Patient Dental Forms, Sick Leave Form, Prescription Management, Income and Expenditure, User Registration, User Permission, Password Change Below is the description of each operation.
PATIENT
From Patient > Patient Information, Patient Information as shown in below
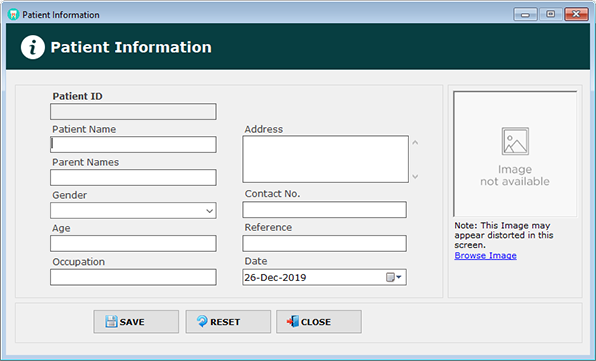
It is mandatory to fill all the star marked filed.
Click on the SAVE button after entering appropriate data.
LIST OF PATIENT
From the Patient menu , click on the List of Patient . List of Patient as shown in below.

For edit Patient information, click on the  button.
To Delete a Patient information , click on the  button.
You can search Patient here.
Select Patient searching parameter form the combo box.
Type into criteria box what you want to search.
DOCTOR
From Doctor > Doctor Information, Doctor Information as shown in below
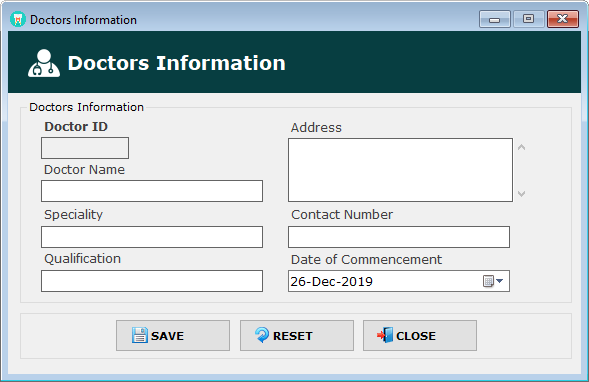
- It is mandatory to fill all the star marked filed.
- Click on the SAVE button after entering appropriate data.
LIST OF DOCTOR
From the Doctor menu , click on the List of Doctor . List of Doctor as shown in below.
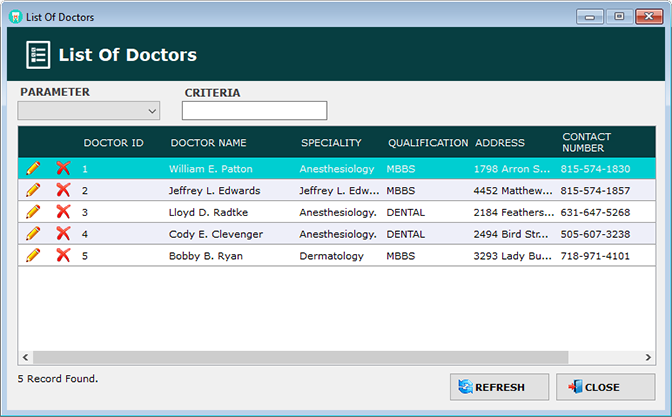
For edit Doctor information, click on the button.
To Delete a Doctor information , click on the button.
You can search Doctor here.
Select Doctor searching parameter form the combobox.
Type into criteria box what you want to search.
PHARMACY
From Pharmacy > Product Information, Product Information as shown in below
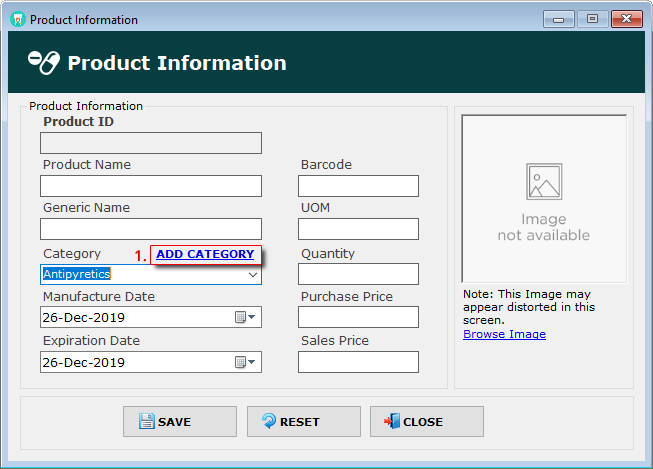
Click on the ADD CATEGORY link label to add/edit Product category. It mandatory to add category during product information Save/Change.
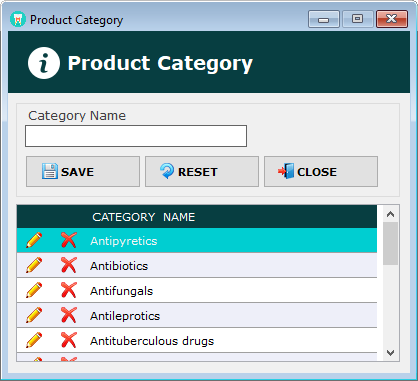
After category had saved go back to Product Information form.

It is mandatory to fill all the  star marked filed.
Click on the SAVE button after entering appropriate data.
LIST OF DOCTOR
From the Pharmacy menu , click on the Product List . Product List as shown in below.
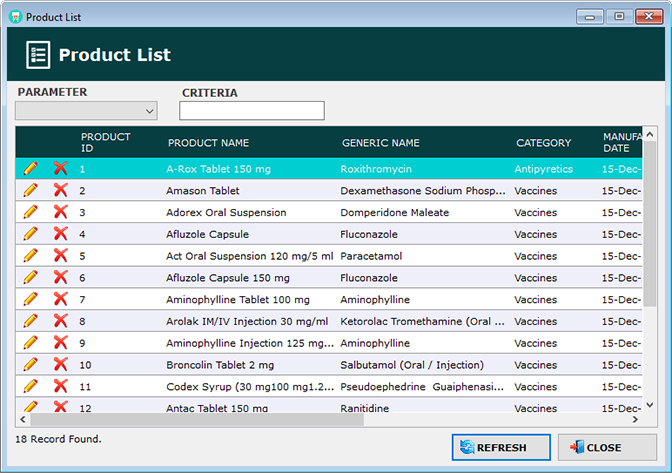
For edit Product information, click on the button.
To Delete a Product information , click on the button.
You can search Product here.
Select Product searching parameter form the combobox.
Type into criteria box what you want to search.
SALES
From the Pharmacy menu , click on the Sales . Sales form as shown in below.
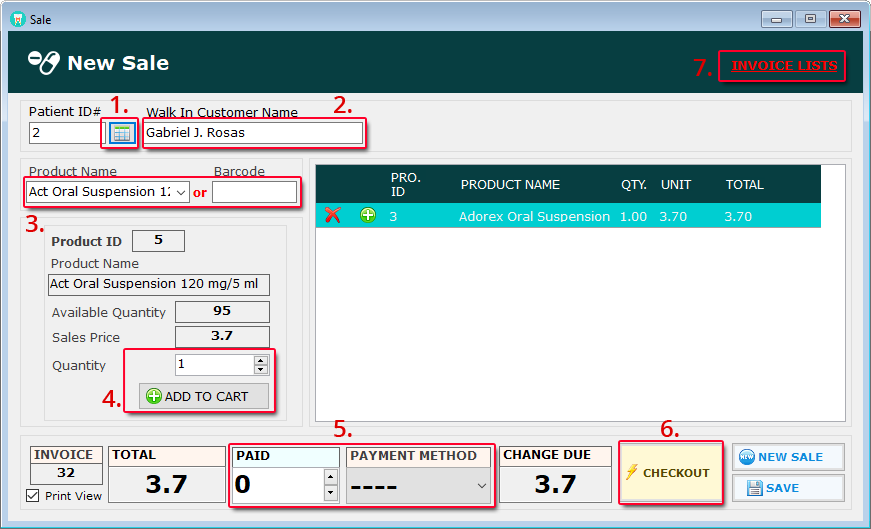
When you open Sales window a Invoice number have been automatically generated.
1.  Click on the Patient list button to find out a existing patient name.
2. You can also put the Walk in customer name.
3. Form The Product Name Combo box select a product, available stock quantity and sales price has displayed.
4. Click on the  button. You can Increase product quantity , click on the
  button from on the sold produce datagrid. To Delete sold Product, click on the button.
5. Enter customer paid Amount and select payment method.
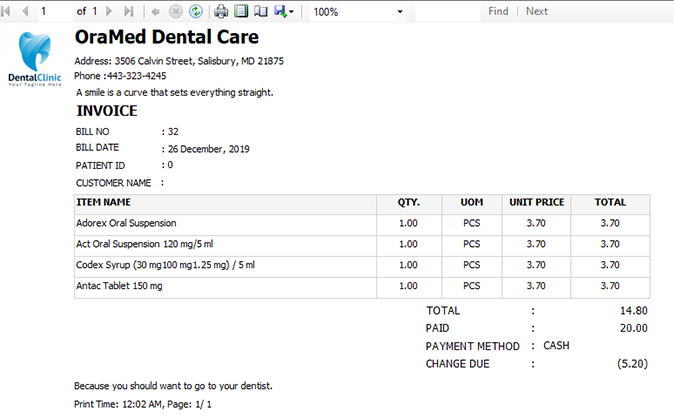
6. Click the CHECKOUT to complete the sale. A print preview copy of the bill will be displayed.
7. Click on the INVOICE LIST to see a list of bills by date.
REPORTS
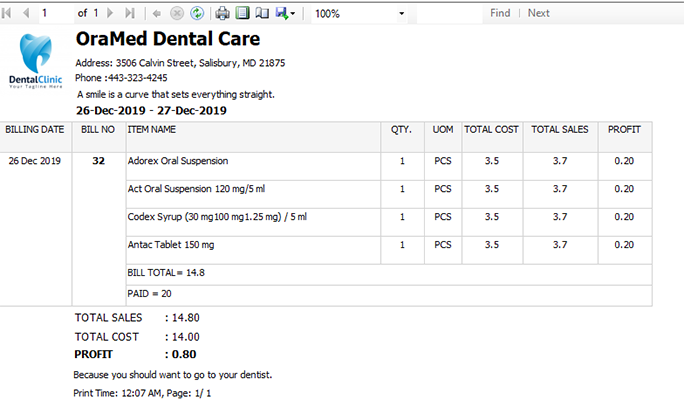
From Pharmacy > Reports, Reports form as shown in below

TREATMENT
From the Treatment menu , click on the Dental’s Screen. Dental’s Screen as shown in below. Comprehensive Diagnostics, Planning & Treatment. Create patient dental charts with diagnoses for each tooth, various custom treatment plans and treatment progress.
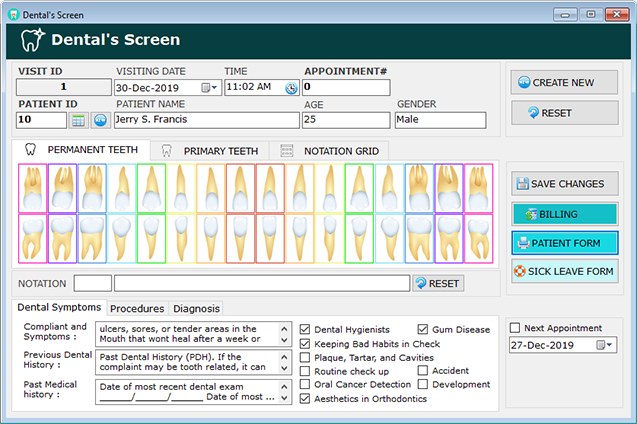


1. Click on the Patient list button to find out a existing patient name.
2. You can also put the Walk in customer name, Visiting date & time as well.
3. Click on the CREATE NEW button to create a new prescription.
4. Here you can input Compliant and symptoms, Previous dental history, Medical history so on.
5. Add dental procedure by clicking on teeth diagram with notation.
6. You can customize dental notation by click on Notation grid.
7. Add diagnosis with diseases.
8. You can set a date for the next appointment.
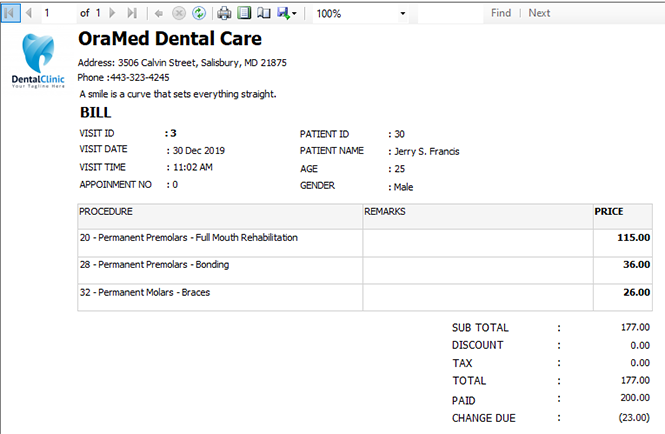
9. Click the Billing button for Billing..
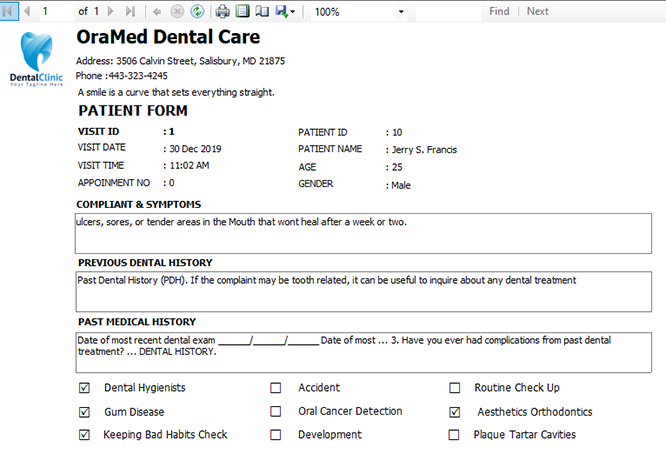
10.Click the Patient Forms button for the print preview.
One day or longer medical or dental treatment Medical or dental treatment including hospital treatment (in-patient or day patient) requiring time off work of at least one day/shift, falls within the remit of sickness absence.
11. You can create sick leave form for the patient.
PATIENT VISIT LIST
From the Prescription menu , click on the Patient Visit List. Patient Visit List as shown in below.
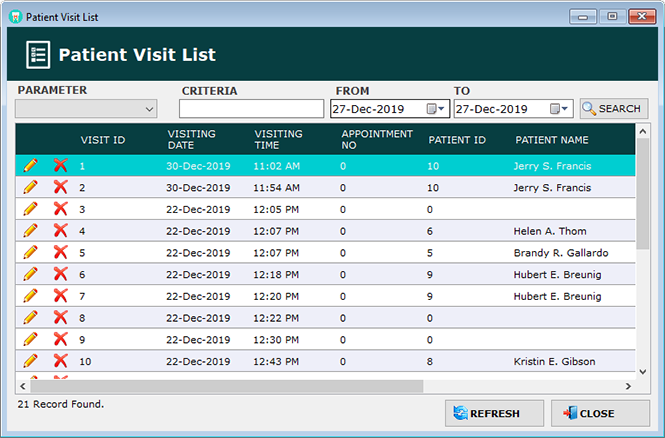
For edit Visit information, click on the button.
To Delete a Visit information, click on the button.
You can search Visit information here by date range.
Select Visit searching parameter form the combobox.
Type into criteria box what you want to search.
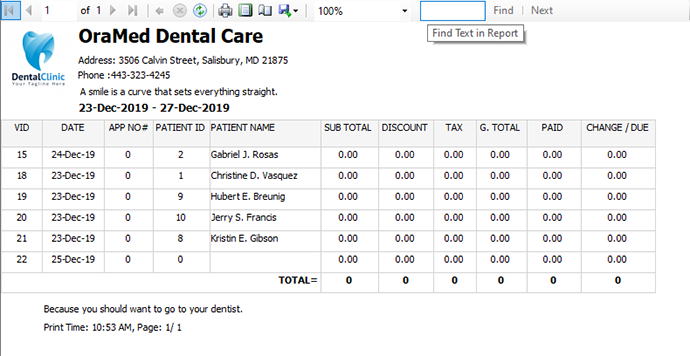
REPORTS
From Prescription > Reports, Reports form as shown in below

PRESCRIPTION
From Prescription > Prescription, Prescription as shown in below. This module is a very smart & suitable for prescription writing. Its easier & more speedy than hand writing. Doctors can now prepare prescription within 20-60 seconds using this module. . More patients can be prescribed within specific time.
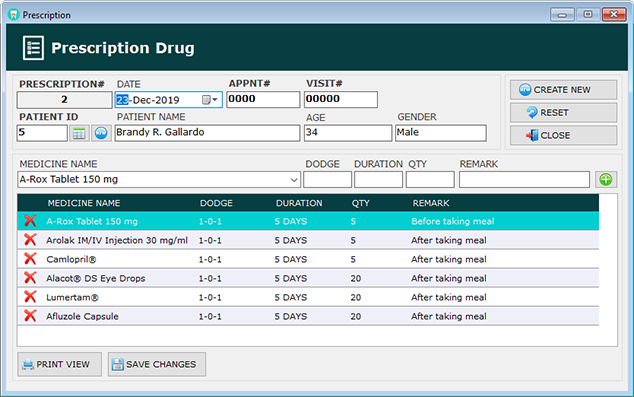

When you open Sales window a Invoice number have been automatically generated.
1. Click on the Patient list button to find out a existing patient name.
2. You can also put the Walk in customer name.
3. Click on the CREATE NEW button to create a new prescription.
Select Medicine name, enter dodge, duration, quantity & remark as well. Click on the  button.
It is mandatory to fill all the star marked filed.
Click on the PRINT PREVIEW button to print view the prescription.
Click on the SAVE button after entering appropriate data.
PRESCRIPTION LIST
From the Prescription menu , click on the Prescription List . Prescription List as shown in below.
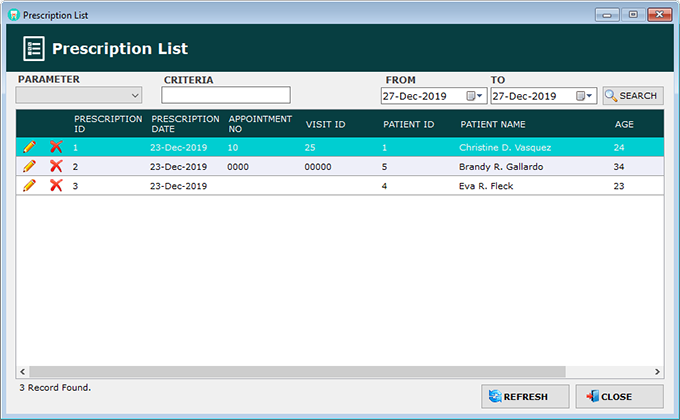
For edit Prescription information, click on the button.
To Delete a Prescription , click on the button.
You can search Prescription here.
Select Prescription searching parameter form the combo box.
Type into criteria box what you want to search.
INCOME & EXPENDITURE
From the Income and Expenditure menu , click on the Voucher.

1. To make Income and Expenditure vouchers, you must first save some account names. These accounts will be considered as revenue/ expenditure head. Click the ADD ACCOUNT Button to save theIncome and Expense account head.
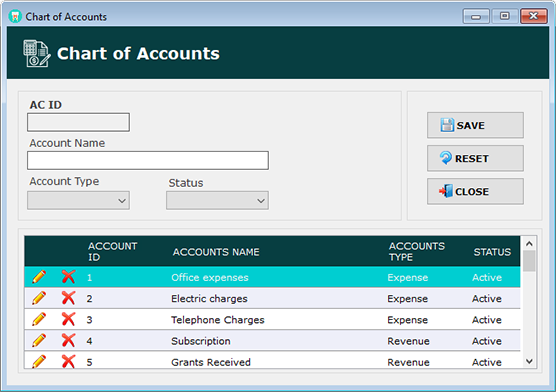
After Account Name had saved go back to Voucher form.
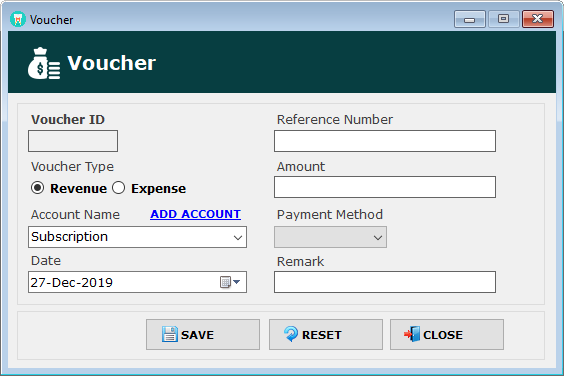
It is mandatory to fill all the star marked filed.
Click on the SAVE button after entering appropriate data.
LIST OF VOUCHER
From the Income and Expenditure menu , click on the List of Voucher. List of Vouchers shown in below.
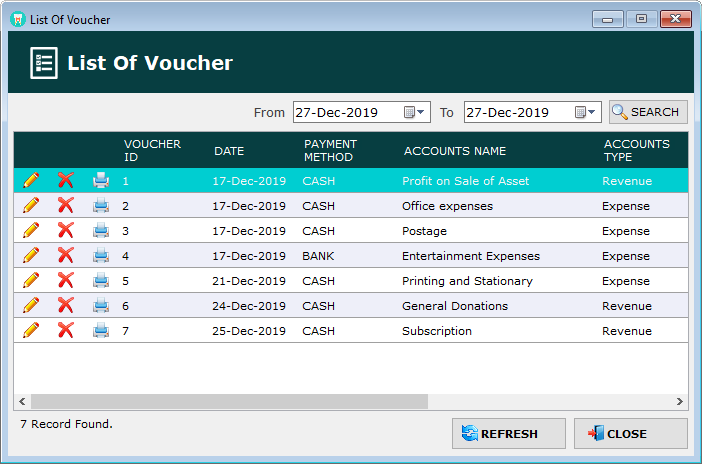
You can search Voucher here by date range.
For edit Voucher information, click on the button.
To Delete an Voucher information , click on the button.
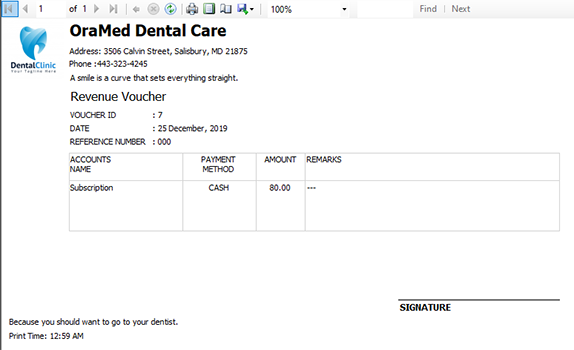
Print Preview Voucher , click on the  button.
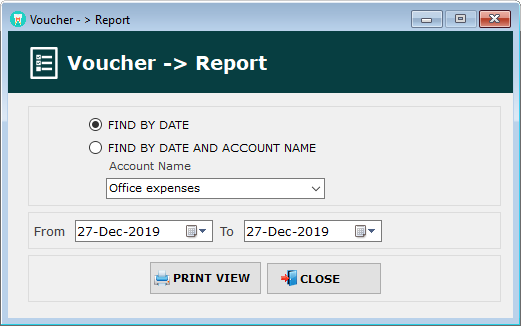
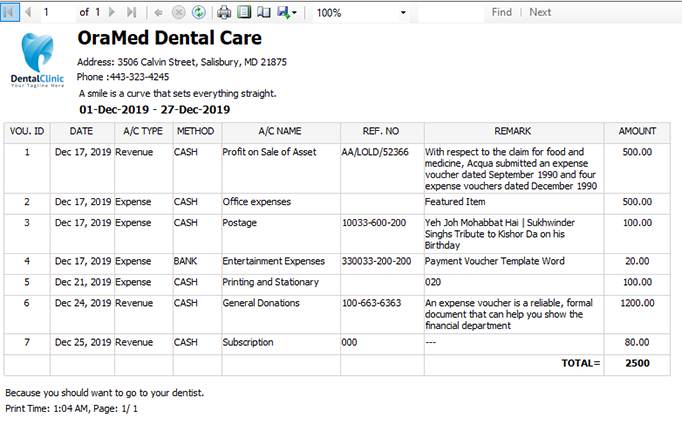
REPORTS
From Voucher > Reports, Reports form as shown in below
SUPPORT
Providing around the clock support has been a goal for KAMA TECHNOLOGY Team from the start. Didn’t find your answers? Write us to sheref@kamagroup.org . Please keep in mind that the more information you provide about your problem, the better chance we have in finding the solution.